
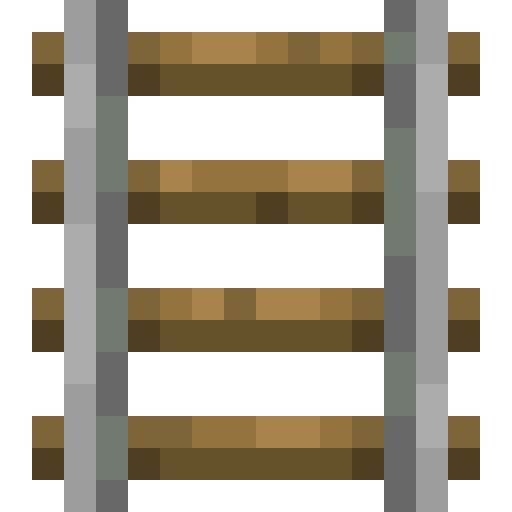
Rails in Minecraft - the complete guide
Non-solid block
4 (regular, powered, detector, activator)
Any (drops without a tool)
Yes (64)
8 blocks/s
6 iron + 1 stick = 16 rails
Table of contents
What rails are
Rails are the blocks that minecarts ride on. They let you build transport systems, from a simple line between two points to a full rail network with automatic item sorting and transfer stations.
Rails appeared in Minecraft very early, back in Infdev (June 2010). They have been updated a few times since, but the core mechanic is the same: lay rails on blocks, put a minecart on them and ride.
There are 4 types of rails, and each does a different job:
- Rail - the basic piece of track; a minecart rolls along it on its momentum.
- Powered rail - speeds a minecart up when powered by redstone and brakes it when unpowered.
- Detector rail - detects a minecart passing over it and emits a redstone signal.
- Activator rail - triggers special minecart functions (for example, it ejects the passenger or lights the TNT).
Regular rails generate naturally in abandoned mineshafts, in large numbers alongside chest minecarts. That is the easiest way to get rails early in the game - just walk through a mineshaft and pick the track up off the ground.
Regular rails (Rail) - crafting
Craft basic rails from 6 iron ingots and 1 stick. One craft gives you 16 rails - a pretty good ratio of materials to output.
Regular rails are the only type that forms curves automatically. When you place rails at a right angle to each other, the corner rail turns into a curve. A minecart rolls along on its momentum - on flat ground it slowly loses speed and eventually stops. That's why you need powered rails to keep it moving.
Cost per 100 blocks of track: 7 crafts = 42 iron ingots + 7 sticks = 112 rails (12 left over).
Powered rails (Powered Rail) - crafting and how they work
Powered rails are the most important part of a railway after the regular track. They speed up a passing minecart when powered by a redstone signal. Without power they brake the minecart, so they work as a brake.
Ingredients: 6 gold ingots, 1 stick and 1 redstone dust. That makes 6 powered rails - far fewer than 16 regular ones, and gold is more expensive than iron. That is why powered rails are used sparingly.
How to power powered rails
- Redstone torch - the simplest option. Place it next to the powered rail or under the block the rail sits on.
- Lever - a switch, handy at stations (turns the minecart start on and off).
- Button - brief power, ideal for start stations.
- Detector rails - automatic power when a minecart rolls past.
- Block of Redstone - constant power, place it under the rail.
Detector rails (Detector Rail) - crafting and how they work
Detector rails work as a motion sensor for minecarts. When a minecart rolls over a detector rail, it emits a redstone signal of strength 15 - you can connect it to any mechanism: a door, a lamp, a trap, a sorting system.
Ingredients: 6 iron ingots, 1 stone pressure plate and 1 redstone dust. That makes 6 rails.
What detector rails are used for
- Automatic doors - a rail in front of a door opens it as a minecart rolls through.
- Powering powered rails - put a detector next to a powered rail to power the drive automatically while a minecart is nearby.
- Sorting systems - detects chest minecarts and sends them to the right track using comparators.
- Counting items - a detector rail plus a comparator measure how full a chest minecart is, so you can sort by the number of items.
A detector rail with a redstone comparator emits a signal whose strength is proportional to how full the chest minecart is. Empty minecart = strength 0, full = strength 15. This is the foundation of railway sorting systems.
Activator rails (Activator Rail) - crafting and how they work
Activator rails are the least used type of rail, but they have unique functions that no other rail offers.
Ingredients: 6 iron ingots, 2 sticks and 1 redstone torch. That makes 6 activator rails.
What activator rails do
When an activator rail is powered by redstone and a minecart rolls over it:
- Minecart with a player or mob - ejects the passenger from the minecart.
- Minecart with TNT - lights the TNT (the minecart explodes after 4 seconds, or immediately if it falls from a height).
- Minecart with a hopper - disables the hopper (it stops picking up and releasing items until the minecart rolls over an unpowered activator rail).
- Minecart with a command block - triggers the command block inside the minecart.
Minecarts - all types
A minecart is an entity that rides on rails. Craft a basic one from 5 iron ingots in a U shape on a crafting table. There are several variants:
The most useful in everyday play are the plain minecart (personal transport), the chest minecart (cargo lines) and the hopper minecart (automatic collection of drops from farms). The TNT minecart makes a great weapon - send it down the track toward an enemy and an activator rail sets off the charge.
Speed and rail mechanics
Understanding how speed works is the key to building an efficient railway.
Basic values
- Max speed: 8 blocks per second (on each axis).
- Powered rail (active): speeds the minecart up.
- Powered rail (inactive): brakes the minecart.
- Uphill: the minecart loses speed - it needs a powered rail every 2-3 blocks.
- Downhill: the minecart speeds up under gravity and needs no power.
Best powered rail spacing
A chest minecart full of items loses speed faster than an empty one. On long cargo routes it pays to shorten the gap between powered rails to 20-22 blocks, so the minecart doesn't stall halfway.
Slopes and curves
Slopes
Rails automatically form a 45-degree slope when you connect a rail on a lower level to a rail on a higher one. The minecart rides up the slope or rolls down it. All 4 types of rails support slopes.
- The minecart loses speed on every block of an upward slope. Without a powered rail it will stop partway up.
- Going downhill speeds the minecart up. Even from a standstill, a minecart will start rolling down a slope on its own.
- At the end of a slope the minecart keeps going on flat ground at the speed it had at the top (or at the bottom).
Curves
Only regular rails form curves. Powered, detector and activator rails only go straight - they don't turn. A curve forms automatically when two regular rails meet at a 90-degree angle.
  ═══╗
     ║     The rail automatically forms a curve
     ║     where the tracks meet
     ║
     ╚═══
Junctions (T-junction): When three tracks meet at one point, you get a junction. By default the curve sends the minecart one way, but you can change the direction with a redstone signal. A powered curve rail switches by 90 degrees - this is the basis of railway switches.
Redstone integration
Rails and redstone work together in many setups. Here are the key mechanics:
Powered rails + redstone
Powered rails have to be powered to work. A redstone signal travels along powered rails for 9 blocks (1 powered rail + 8 neighboring powered rails). So one redstone source can power a line of 9 powered rails in a row.
Detector rails as a signal source
A detector rail emits a redstone signal for about 1 second while a minecart rolls over it. Connect it to:
- A neighboring powered rail - it drives the minecart automatically when it is nearby (saves redstone on constant power).
- A junction - switches the curve direction depending on which side the minecart arrives from.
- Traps - triggers a dispenser, a note block, a door, a piston bridge - anything redstone-powered.
Comparator + detector rail
Connect a redstone comparator to a detector rail and you can read how full a chest minecart is. A signal strength of 0-15 matches how full it is. That lets you build sorting systems: a minecart carrying a given number of items is sent to the right track.
  [Powered Rail] ←powered
  [Detector Rail] ──── [Comparator] → [Redstone] → [Junction]
  [Powered Rail] ←powered
         |                                              |
     track A ←─────────────────────── empty minecart ──→ track B
                                                    full minecart
Building a railway - step-by-step guide
Here's how to build a working railway line between two points (for example, your base and a mine):
Materials needed (per 100 blocks of route)
- ~100 regular rails (7 crafts = 42 iron ingots)
- ~4 powered rails (1 craft = 6 gold ingots + 1 redstone)
- 2 powered rails for the start stations
- 4 redstone torches (to power the powered rails)
- 2 buttons (at the start stations)
- 2 minecarts
- Blocks to lay the track on (cobblestone, stone, dirt - anything solid)
Build instructions
- Plan the route - as flat as possible. Every hill needs extra powered rails, which raises the cost. If the route crosses hills, consider a tunnel.
- Lay the track - from station A to station B. Rails connect to their neighbors automatically. Use regular rails on the curves.
- Add a powered rail every 25 blocks - replace every 25th regular rail with a powered rail. Place a redstone torch next to each one (or a block of redstone under the rail).
- Build the stations - at each end of the route place a powered rail (unpowered, as a brake) with a button next to it. The player gets in the minecart, presses the button, the powered rail activates and the minecart starts moving.
- Place the minecart - right-click on the rail. Get in with a right-click and press the button to start.
  [Block]
  [Powered Rail] ← unpowered (brake)
  [Powered Rail] ← button next to it (start)
  [Regular rail]
  [Regular rail]
      ...         ← 25 regular rails
  [Powered Rail] ← redstone torch next to it
  [Regular rail]
      ...         ← next 25 rails
  [Powered Rail] ← button next to it
  [Powered Rail] ← unpowered (brake)
  [Block]
Expanding - cargo lines
To move items, use chest minecarts or hopper minecarts. At the loading station, place a hopper above the rail to load items into the minecart. At the unloading station, place a hopper under the rail to pull items out. Detector rails with redstone control the acceleration and braking.
Tips and tricks
Abandoned mineshafts generate hundreds of rails on the ground. Instead of crafting, look for a mineshaft - in one you can find 100-300 rails and a few chest minecarts for free. It's the best way to get rails in the early game.
Instead of placing a redstone torch next to a powered rail, you can hide a block of redstone under the block the rail sits on. It looks cleaner, with no torches sticking out. It costs more (9 redstone per block), but it's nicer to look at.
On very long routes (500+ blocks), a boat on blue ice is much faster than a minecart, which tops out at 8 blocks/s. But rails are simpler to build and don't need blue ice, which is hard to get. For short routes (base to mine, base to farm) rails are ideal.
1 block in the Nether = 8 blocks in the Overworld. Build the railway in the Nether, and 100 blocks of track cover 800 blocks of distance in the normal world. It's the best ratio of materials to distance covered.
Put detector rails at the unloading station, connected to an unpowered powered rail. When a chest minecart rolls over, the detector powers the powered rail (sending the minecart on its way) while the hopper under the rail pulls out the items. Nothing stops and nothing needs manual control.
A hopper minecart picks up items lying on the ground. Run a track loop under the wheat fields, and the hopper minecart collects all the crops automatically once the wheat has grown and been harvested with water.
Frequently asked questions (FAQ)
How do you make rails in Minecraft?
Regular rails are crafted from 6 iron ingots and 1 stick. On a crafting table the left and right columns hold 3 iron ingots each (stacked vertically), with the stick in the middle. One craft gives you 16 rails.
How many types of rails are there in Minecraft?
There are 4 types of rails: the regular rail, the powered rail, the detector rail and the activator rail. Each one has a different recipe and a different job.
How do you speed up a minecart?
Use powered rails fed with redstone. Powered rails speed a minecart up to the maximum of 8 blocks/s. On flat ground place them every 25-27 blocks, uphill every 2-3 blocks.
What is the maximum speed of a minecart?
8 blocks per second (28.8 km/h). More powered rails in a row won't make it go faster - the speed is a hard cap. On flat ground without power, a minecart gradually slows down because of friction.
Can rails curve and climb slopes?
Yes. Regular rails form curves automatically when you connect them at a right angle, and all 4 types of rails can climb 45-degree slopes (1 block up for every block forward). Only regular rails make curves - powered, detector and activator rails only go straight.
How much iron do you need for 100 blocks of rails?
42 iron ingots (7 crafts of 6 ingots make 112 rails, and 12 are left over). Add gold for powered rails and redstone for detector rails if you are building a full powered line.
Related pages
- Minecraft items and blocks - the full database
- Crafting recipes - graphical layouts
- Redstone guides - mechanisms and contraptions
- Hopper - automation with hoppers
- Nether guide - building a railway in the Nether
- Minecraft farms - automatic resource sources
- Villager trading - professions and offers